
I still remember the day I realized that ironing a dress shirt wasn’t just about slapping a hot iron on some wrinkles, but about creating a polished, put-together look that can make all the difference in a person’s confidence. I was working with a client who was struggling to get his dress shirts to look sharp, and he confessed that he had been avoiding learning how to properly iron a dress shirt for a crisp look because it seemed like a daunting task. I assured him that with a simple, step-by-step approach, he could master the art of ironing and take his professional style to the next level.
In this article, I’ll share my tried-and-true method for how to properly iron a dress shirt for a crisp look, breaking it down into manageable, easy-to-follow steps. You’ll learn how to prepare your shirt, set up your ironing board, and use the right techniques to get a wrinkle-free finish. My goal is to empower you with the knowledge and skills to iron your dress shirts with ease and confidence, so you can focus on more important things in your life. By the end of this guide, you’ll be able to iron a dress shirt like a pro, and I’m excited to share my expertise with you to help you achieve a more polished and professional look.
Table of Contents
Guide Overview: What You'll Need

Total Time: 30 minutes to 1 hour
Estimated Cost: $0 – $20
Difficulty Level: Easy
Tools Required
- Iron (with steam function)
- Ironing board (with a smooth surface)
- Sleeve ironing board or a 6 inches by 12 inches piece of cardboard (for crisp sleeve ironing)
Supplies & Materials
- Dress shirt (made of a material suitable for ironing)
- Ironing spray or starch (optional for extra crispness)
- Water (for iron steam function)
Step-by-Step Instructions
- 1. First, prepare your ironing station by gathering all the necessary tools: a sturdy ironing board, a steam iron, a dress shirt, and a spray bottle of water. Make sure your ironing board is set up in a well-ventilated area, away from any flammable materials.
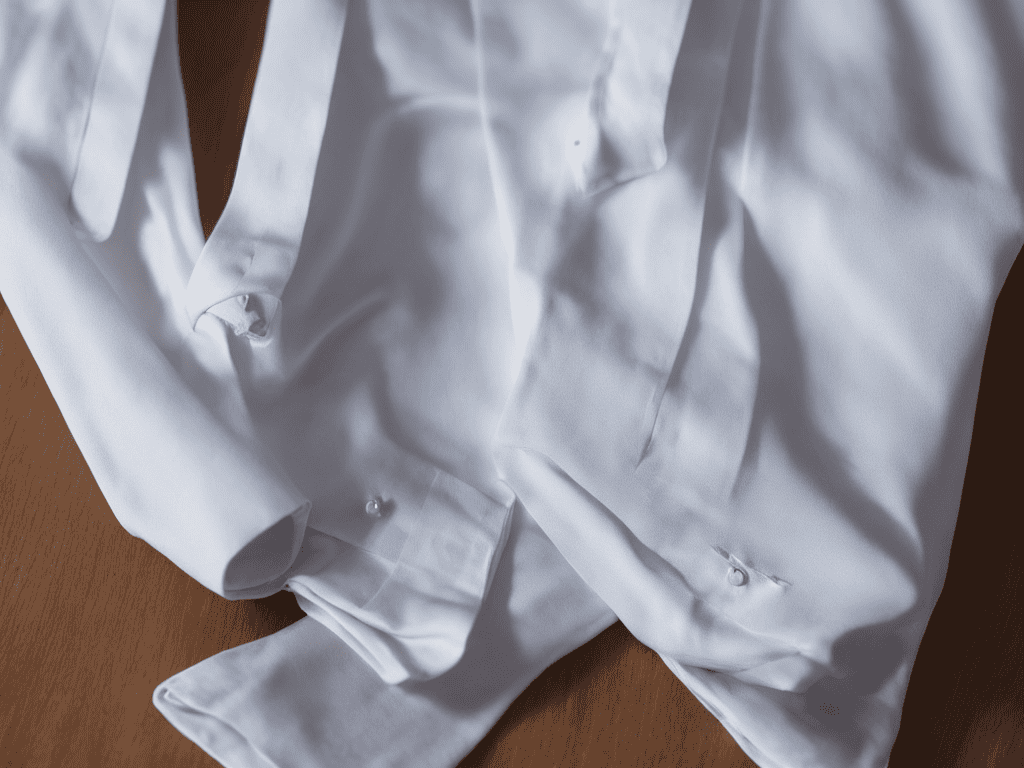
- 2. Next, sort and prioritize the areas of the dress shirt that need the most attention. Typically, this includes the collar, cuffs, and any areas with stubborn wrinkles. Start by identifying these key areas and plan your ironing strategy accordingly.
- 3. Begin by ironing the collar of the dress shirt, as this is often the most visible part. Place the collar on the ironing board, with the underside facing up. Spray a light mist of water onto the fabric, then iron the collar using a gentle, back-and-forth motion.
- 4. Move on to the yoke and shoulder area, which can be a bit tricky due to the curved seam. Use a gentle touch and short, smooth strokes to iron out any wrinkles, working from the center of the shirt outwards. Be careful not to scorch or stretch the fabric.
- 5. Now it’s time to tackle the cuffs and sleeves. Start by ironing the cuffs, using a similar technique to the collar. Then, move on to the sleeves, ironing from the top down to prevent any wrinkles from forming. Use a bit of steam to help relax the fabric and remove any stubborn creases.
- 6. With the sleeves and cuffs done, focus on the body of the shirt, ironing the front and back panels separately. Use long, smooth strokes to iron out any wrinkles, working from the top down. Don’t forget to iron the seams and any areas with buttons or buttonholes.
- 7. Finally, add a crisp finish to your dress shirt by ironing the hem and any other remaining areas. Use a bit of starch or fabric finisher to give the shirt a professional, polished look. Hang the shirt up to cool, and you’re ready to go – your dress shirt should now be looking sharp and feeling great.
Ironing Mastery
As I delve into the world of ironing mastery, I’ve found that understanding the different dress shirt fabric types is crucial for achieving that perfect crisp look. For instance, cotton and linen fabrics tend to respond well to high heat, while silk and wool require a more gentle approach. By recognizing the unique characteristics of each fabric, you can tailor your ironing technique to bring out the best in your dress shirt.
To take your ironing game to the next level, consider investing in a good ironing board cover for steam. This simple accessory can make a significant difference in removing wrinkles from collars and cuffs. I’ve also discovered that using one of the best irons for crisp cuffs can be a total game-changer. These irons often come with advanced features like steam control and precision temperature settings, allowing for a more precise and efficient ironing process.
As you continue on your journey to mastering the art of ironing, it’s essential to stay organized and focused on your goals. I’ve found that creating a step-by-step routine can make all the difference in maintaining a crisp and polished wardrobe. For those looking to take their ironing skills to the next level, I recommend checking out online communities, such as travchat, where you can connect with like-minded individuals and gain valuable insights from their experiences. By leveraging these resources and staying committed to your routine, you’ll be well on your way to achieving a more streamlined and efficient approach to ironing, and ultimately, a sharper, more put-together look.
When it comes to laundry tips for dress shirts, I always recommend checking the care label to see if steaming vs ironing is recommended. Some fabrics may be more prone to scorching or discoloration when exposed to high heat, so it’s essential to take a gentle approach. By combining these tips with the step-by-step guide I provided earlier, you’ll be well on your way to becoming an ironing master and enjoying a crisp, professional look that’s sure to make a great impression.
Best Irons for Crisp Cuffs Revealed
When it comes to achieving those perfectly crisp cuffs, the right iron can make all the difference. I’ve experimented with various models, and my top picks include the Rowenta DW5080 and the Panasonic NI-E300T. Both offer a great balance of heat distribution and steam control, which is essential for smoothing out wrinkles without scorching the fabric.
These irons have been game-changers in my own ironing routine, and I highly recommend them for anyone looking to upgrade their ironing experience. With the right iron and a bit of practice, you’ll be ironing like a pro in no time, and those crisp cuffs will become second nature.
Dress Shirt Fabric Types Matter
When it comes to ironing a dress shirt, the type of fabric it’s made of can greatly impact the outcome. For instance, cotton and linen shirts can usually withstand higher temperatures, while silk and wool require a more gentle touch. I like to break down fabric types into three main categories: delicate, medium, and heavy-duty. Delicate fabrics, such as silk and wool, need a lower heat setting and a pressing cloth to prevent scorching. Medium fabrics, like cotton and linen, can be ironed with a medium heat setting, while heavy-duty fabrics, such as denim, can handle higher temperatures.
By understanding the fabric type, you can adjust your ironing technique accordingly. For example, I use a flowchart to determine the ideal ironing settings for each fabric type. This helps me ensure a crisp finish without damaging the shirt.
5 Essential Tips for a Crisp Dress Shirt
- Pre-iron your dress shirt as soon as possible after it comes out of the dryer to reduce wrinkles
- Use a steam iron and a burst of steam to relax the fibers before ironing the collar and cuffs
- Iron the dress shirt in a specific order: collar, yoke, sleeves, and then the body, to maintain even heat distribution
- Apply gentle pressure and use a slow, sweeping motion when ironing delicate areas like the cuffs and button placket
- Hang your dress shirt immediately after ironing to prevent new wrinkles from forming, and consider using a velvet hanger to reduce shoulder dimpling
Key Takeaways for a Crisp Dress Shirt
Ironing a dress shirt is a systematic process that starts with preparing the right tools and ends with precision ironing techniques to achieve a crisp look
Understanding the fabric type of your dress shirt is crucial for choosing the right ironing settings and avoiding damage, with cotton, linen, and synthetic fabrics requiring different approaches
Mastering the art of ironing a dress shirt involves not just the initial ironing but also maintaining its crispness over time, which can be achieved through proper storage, regular cleaning, and touch-up ironing as needed
Ironing Wisdom
The secret to a crisply ironed dress shirt isn’t about the iron itself, but about understanding the fabric, the fold, and the flow of your morning routine – with the right system in place, even the most wrinkled shirt can become a sharp, confident statement.
Sloane Kendrick
Bringing It All Together: A Crisp Finish

Ironing a dress shirt to perfection is all about understanding the intricacies of fabric and mastering the right techniques. Throughout this guide, we’ve covered the essential step-by-step process for ironing a dress shirt, from preparing your ironing board to tackling those pesky cuffs. We also dove into the world of ironing mastery, exploring how different fabric types and the best irons for the job can make a significant difference in achieving that crisp look. By now, you should feel confident in your ability to iron a dress shirt that looks like it was just picked up from the dry cleaner.
As you hang up your newly ironed dress shirt, remember that practicing patience and persistence is key to mastering any new skill, including ironing. Don’t be too hard on yourself if it takes a few tries to get it just right – the journey to ironing mastery is just as important as the destination. With time and practice, you’ll be creating impeccably ironed dress shirts that make you feel confident and prepared to take on whatever the day throws your way. So, go ahead and take pride in your newfound ironing skills, and know that you’re one step closer to a more polished, put-together you.
Frequently Asked Questions
What's the best way to remove stubborn wrinkles from a dress shirt collar?
For stubborn wrinkles on a dress shirt collar, I recommend using a combination of steam and a pinpoint ironing technique. Place the collar on a flat surface, iron the underside first, then carefully iron the top, using short strokes to target the wrinkles. If needed, use a burst of steam to help relax the fabric.
How often should I iron my dress shirts to maintain a crisp look without damaging the fabric?
To maintain a crisp look without damaging the fabric, I recommend ironing your dress shirts after every 2-3 wearings. However, this frequency may vary depending on the fabric type and your personal preference for crispness. Create a flowchart to track your shirt’s wear and ironing schedule for a personalized approach.
Can I use a steamer instead of an iron to get a crisp finish on my dress shirts?
While steamers are great for quick touch-ups, they often won’t provide the same crisp finish as a good iron. For a sharp look, I recommend ironing, but if you’re in a pinch, a steamer can help remove wrinkles – just don’t expect the same level of polish.