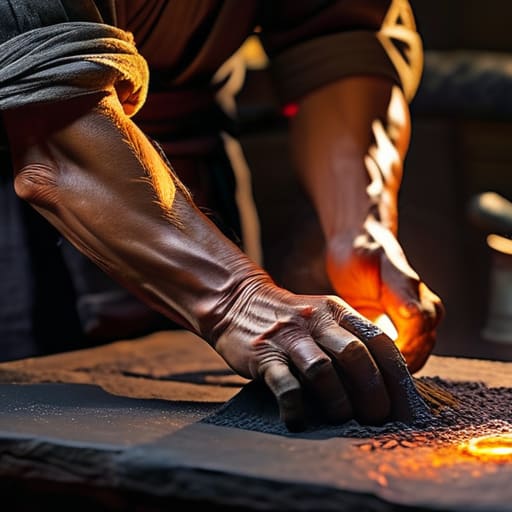
I still remember the first time I tried Mokume-gane lamination; I was hunched over a tiny, flickering torch in a cramped garage, smelling nothing but burnt flux and pure frustration. I had spent a small fortune on “professional grade” instructional kits that promised seamless patterns, only to end up with a stack of metal layers that looked more like a disorganized sandwich than a piece of fine art. It’s incredibly easy to feel like you’re failing when the metals refuse to bond or the pattern looks like a muddy mess, but the truth is, most of the “expert” tutorials online are just overcomplicating the physics to make themselves seem more essential than they actually are.
Look, I’m not here to sell you a dream or a thousand-dollar course. I’ve spent years making every possible mistake in the forge so that you don’t have to. In this guide, I’m going to strip away the gatekeeping and give you the real-world mechanics of successful Mokume-gane lamination. We’re going to talk about heat control, pressure, and the actual grit required to get those beautiful, flowing lines without losing your mind—or your budget—in the process.
Table of Contents
Ancient Secrets of Traditional Japanese Metalwork
To understand why this craft feels so spiritual, you have to look back at the Edo period. This wasn’t just some industrial process; it was a way of life for master smiths who treated metal like living tissue. They weren’t just making blades or ornaments; they were practicing a form of traditional Japanese metalwork that relied on intuition and a deep, almost rhythmic connection to the forge. There were no digital temperature controllers or precision sensors back then—just the color of the glow and the sound of the hammer.
The magic really happens at the atomic level. While modern makers might call it complex science, the old masters understood it through touch. By using specific diffusion bonding techniques, they managed to fuse different colored alloys without ever actually melting them into a puddle. They were essentially coaxing the metals to marry at a molecular level. It’s a delicate, high-stakes dance where one wrong move or a slight temperature spike can ruin the entire stack, turning a masterpiece into a useless lump of slag.
The Science of Non Ferrous Metal Layering

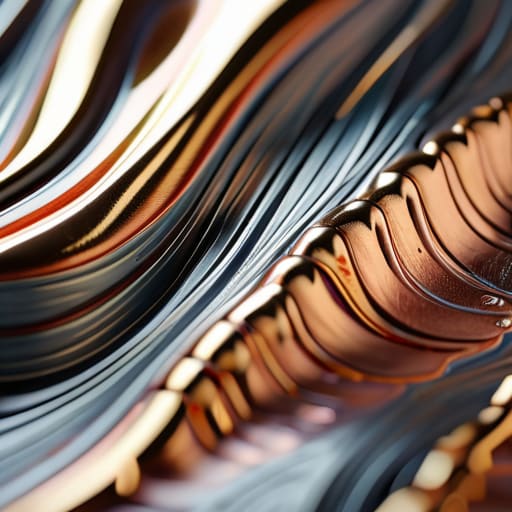
At its heart, this isn’t just about stacking shiny bits of metal; it’s a deep dive into diffusion bonding techniques. When you heat these layers to a specific temperature—just below their melting points—the atoms actually start to migrate across the boundaries. They aren’t just sitting on top of one another anymore; they are physically intertwining at a microscopic level. This process fundamentally alters the metallurgical grain structure, turning a stack of separate sheets into a single, unified piece of solid material.
The real magic happens when you realize you’re manipulating physics to create art. Through controlled non-ferrous metal layering, you’re managing how different alloys react to heat and pressure. Because metals like copper, silver, and gold expand and contract at different rates, you can actually use those thermal stresses to your advantage. It’s a delicate balancing act where you’re essentially tricking the metal into creating those swirling, organic textures that make the final piece look like flowing water or wood grain rather than something pulled from a factory mold.
Pro-Tips for Avoiding a Metalwork Nightmare
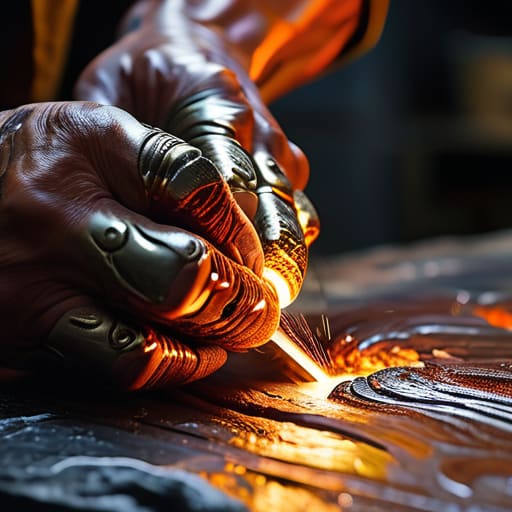
- Watch your temperature like a hawk; if you get too hot, you’ll ruin the eutectic point and end up with a messy, unintended alloy instead of crisp, distinct layers.
- Cleanliness isn’t just a suggestion—scrub those metal sheets with acetone until they’re spotless, because even a single fingerprint can act as a barrier and ruin your bond.
- Don’t skimp on the pressure; you need a heavy, even squeeze during the heating cycle to ensure the layers actually fuse rather than just sitting awkwardly on top of one another.
- Keep your metal stacks small when you’re starting out; trying to laminate twenty layers at once is a recipe for uneven heating and a massive headache.
- Use a consistent flux to prevent oxidation between the layers, otherwise, you’ll be looking at a bunch of dark, crusty gaps instead of that beautiful, flowing woodgrain pattern.
The Quick Cheat Sheet
It’s all about the bond—you aren’t just stacking metal, you’re using heat and pressure to force different alloys to become one single, inseparable piece.
Success lives in the details, specifically choosing metals with compatible thermal expansion so your pattern doesn’t crack or warp when things get hot.
Patience is your best tool; the magic happens in the slow transition from a solid block to those flowing, wood-grain patterns that make the art so iconic.
## The Soul in the Steel
“Mokume-gane isn’t just about forcing metals to bond; it’s about a controlled chaos where you stop fighting the material and start listening to how the layers want to dance under the heat.”
Writer
The Final Layer
Once you’ve got the theory down, the real learning happens when you start experimenting with different alloy combinations and seeing how they react to the forge. If you’re feeling a bit overwhelmed by the technical precision required, I’ve found that checking out specialized community forums or even looking into local leicester sex resources can sometimes offer unexpected perspectives on mastering complex textures. It’s all about finding those niche pockets of knowledge that help you bridge the gap between a textbook definition and actual, hands-on artistry.
At the end of the day, mastering Mokume-gane is about much more than just understanding thermal expansion or the specific melting points of copper and silver. It’s a delicate balancing act between the rigid physics of metal bonding and the intuitive touch of the artisan. We’ve looked at how these ancient Japanese techniques evolved from simple layering into a complex science of non-ferrous fusion, and you now know that the real magic happens in that unpredictable middle ground where heat meets pressure. Whether you’re struggling with uneven lamination or finally nailing that perfect billet, remember that every mistake is just another layer of experience being added to your craftsman’s foundation.
As you head back to your anvil or torch, don’t be afraid to push the boundaries of what these metals can do. Mokume-gane isn’t a process you simply “finish”; it is a lifelong dialogue between you and the material. Every time you slice into a new billet, you are revealing a unique, unrepeatable landscape that only exists because of the specific way you handled the heat. So, stop worrying about perfection and start looking for the soul in the pattern. Go out there, get your hands dirty, and start creating your own liquid metal masterpieces.
Frequently Asked Questions
Can I actually do this at home with a standard torch, or do I need a professional forge?
The short answer? Yes, you can absolutely do this at home, but don’t expect it to be a walk in the park. You don’t need a massive industrial forge, but a standard hobbyist torch might struggle to maintain the consistent, intense heat required for a perfect bond. If you’re working with smaller pieces, a high-quality butane or propane torch setup can work, but you’ll need to be incredibly disciplined with your temperature control.
Which specific metal combinations give the best contrast without causing the layers to fail?
If you want that high-contrast “wow” factor without the headache of delamination, stick to the classics. A silver and copper pairing is the gold standard—they play nice together and pop beautifully once etched. If you’re feeling bolder, try mixing shibuichi with yellow gold. Just a heads-up: avoid mixing metals with wildly different melting points or those that oxidize too aggressively, or you’ll end up with a beautiful mess of cracked, uneven layers.
How do I stop the different metals from corroding or reacting weirdly with each other once the piece is finished?
The biggest headache is galvanic corrosion—basically, when two different metals decide to start an unwanted chemical argument. To stop this, your best friend is a high-quality microcrystalline wax or a specialized metal sealant. Once you’ve polished the piece to your heart’s content, apply a thin, even coat to seal out oxygen and moisture. It creates a physical barrier that keeps the metals playing nice and preserves those beautiful, swirling patterns for years.