I still remember the day I decided to take on the eyesore that was my living room’s popcorn ceiling. The process of Removing Popcorn Ceiling was daunting, but I was determined to bid farewell to that outdated, lumpy monstrosity. As I delved into the world of DIY ceiling renovations, I discovered that many people believed it to be a costly and time-consuming endeavor, requiring professional expertise. However, I’m here to tell you that with the right tools and a bit of elbow grease, you can achieve a sleek, modern look without breaking the bank.
In this article, I’ll share my personal experience and provide you with honest, no-nonsense advice on how to tackle the Removing Popcorn Ceiling process. You’ll learn how to prepare your space, choose the right equipment, and safely scrape away that unwanted texture. I’ll cut through the hype and give you a step-by-step guide to help you achieve a smooth, beautiful ceiling that will completely transform your room. Whether you’re a seasoned DIY enthusiast or a beginner, this guide is designed to empower you with the knowledge and confidence to take on this project and enjoy the satisfaction of a job well done.
Table of Contents
- Guide Overview: What You'll Need
- Step-by-Step Instructions
- Removing Popcorn Ceiling
- Don't Get Caught Slipping: 5 Essential Tips for a Safe and Successful Popcorn Ceiling Removal
- Key Takeaways for a Safe and Successful Popcorn Ceiling Removal
- The Liberation of Scraping
- Conclusion
- Frequently Asked Questions
Guide Overview: What You'll Need
Total Time: 4 hours 30 minutes
Estimated Cost: $50 – $100
Difficulty Level: Intermediate
Tools Required
- Putty Knife (4 inches or 6 inches wide)
- Garden Sprayer (filled with water)
- Drop Cloths (for floor protection)
- Ladder (sturdy, 6 feet or taller)
- Utility Knife (with extra blades)
- Mud Pan (for joint compound)
- Sanding Block (for smoothing ceiling)
- Vacuum Cleaner (with hose attachment)
Supplies & Materials
- Joint Compound (for patching and smoothing)
- Drywall Patch Kit (for large holes or damaged areas)
- Sandpaper (various grits, up to 220-grit)
- Paint (optional, for ceiling repaint)
- Primer (optional, for stain blocking)
Step-by-Step Instructions
- 1. First, prepare the room by covering the floor, furniture, and any remaining items with plastic sheets or drop cloths to prevent damage from falling debris and dust. This will make cleanup easier and save you a lot of hassle in the long run. Remove any lighting fixtures or ceiling fans to prevent them from getting in the way or damaged during the process.
- 2. Next, turn off the power to the ceiling area at the electrical panel to prevent any accidental injuries or electrical shocks. Verify that the power is off using a non-contact voltage tester to ensure your safety while working on the ceiling. This step is crucial and should not be skipped under any circumstances.
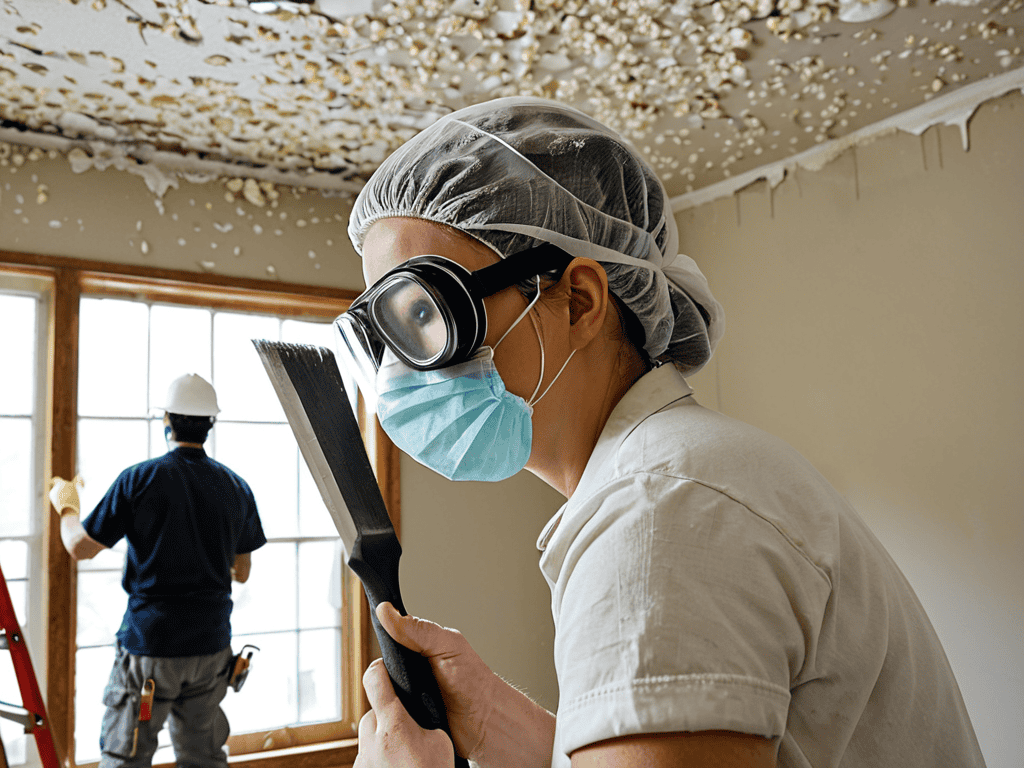
- 3. Now, put on your protective gear, including a mask, goggles, and a hat to protect yourself from the fine dust and debris that will be falling from the ceiling. You may also want to wear long sleeves and gloves to prevent skin irritation. Having the right protective equipment will make the job much safer and more comfortable.
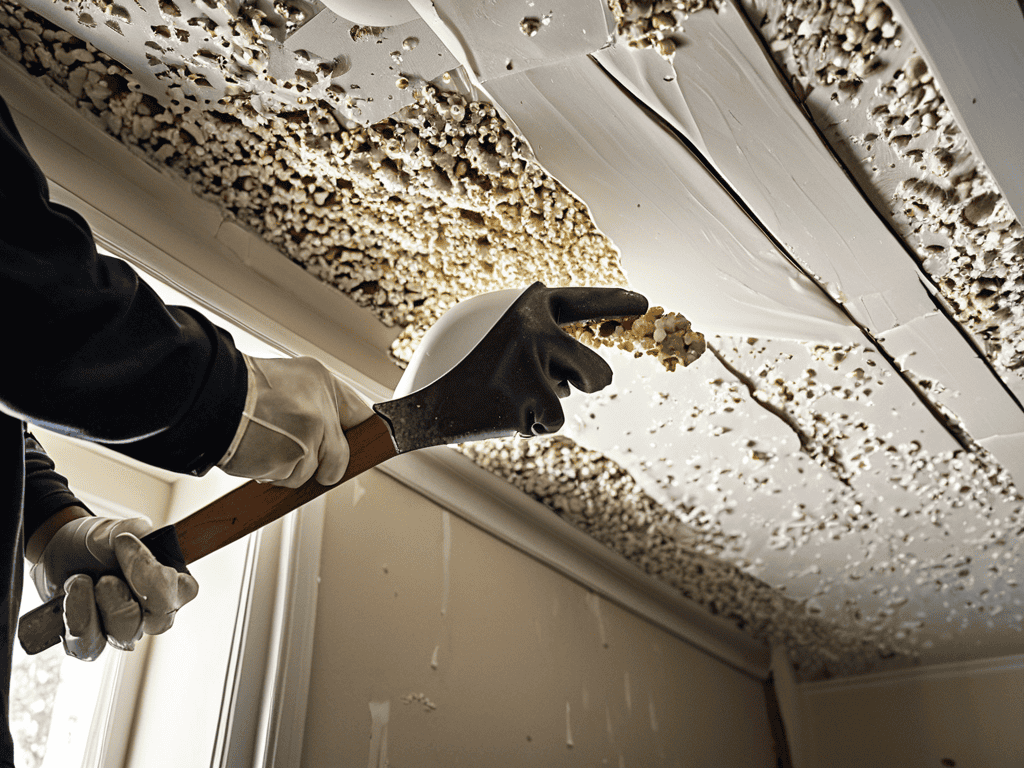
- 4. Start by scraping a small test area to determine the best approach for your specific ceiling. Use a putty knife or a specialized ceiling scraper to gently scrape away the popcorn texture. If the texture comes off easily, you can proceed with the rest of the ceiling. If it’s stubborn, you may need to use a solution to loosen it before scraping.
- 5. For the actual removal, work in sections to maintain organization and efficiency. Divide the ceiling into smaller areas, and complete one section at a time. This will help you keep track of your progress and ensure that you don’t miss any spots. Use your putty knife or ceiling scraper to scrape away the popcorn texture, applying moderate pressure.
- 6. If the popcorn texture is particularly stubborn, you may need to apply a loosening solution to help break it down. Mix a solution of water and fabric softener, and spray it onto the ceiling. Let it sit for about 15-20 minutes to allow the solution to penetrate and loosen the texture. Then, use your scraper to remove the texture.
- 7. After scraping away the popcorn texture, clean the ceiling to remove any remaining dust, debris, or solution. Use a vacuum cleaner with a soft brush attachment to gently sweep away the dust and debris. Then, dampen a cloth with water and wipe down the ceiling to remove any remaining residue. This will prepare the ceiling for any subsequent repairs or painting.
Removing Popcorn Ceiling

As you’re wrapping up your popcorn ceiling removal project, it’s essential to think about the finishing touches, like adding some new lighting or decor to really make your space shine. If you’re looking for some inspiration, I’ve found that chatting with others who have gone through similar renovations can be super helpful – it’s amazing how a fresh perspective can help you avoid costly mistakes or discover new ideas you hadn’t thought of. For example, I recently stumbled upon a community at Sexchat where people were sharing their experiences and advice on everything from DIY projects to home decor, and it was really interesting to see how others had tackled similar challenges. By connecting with others who have been in your shoes, you can gain valuable insights and stay motivated to see your project through to the end.
When it comes to scraping away that awful popcorn texture, smooth ceiling finish techniques can make all the difference. To achieve a flawless finish, make sure to apply a joint compound to the entire ceiling surface after removal, and then sand it down to a smooth finish. This step is crucial in creating a uniform base for painting or further decoration. Additionally, consider exploring different ceiling texture options to add some personality to your newly renovated space.
As you work on your diy ceiling renovation, keep in mind that the overall cost of the project can vary greatly depending on the size of the room and the materials used. The popcorn ceiling removal cost can range from a few hundred to several thousand dollars, so it’s essential to plan ahead and set a realistic budget. Moreover, if your home was built before the 1980s, you may need to take asbestos removal safety precautions to ensure a safe and healthy environment.
After the removal process, you may need to perform some ceiling repair to fix any damaged areas. This can include patching holes or cracks, and applying a new layer of joint compound to blend the repaired areas with the rest of the ceiling. By following these tips and taking the necessary precautions, you can enjoy a beautiful, smooth ceiling that adds a touch of elegance to any room.
Asbestos Removal Safety Precautions
When dealing with popcorn ceilings, especially those installed before the 1980s, there’s a chance they may contain asbestos. This toxic substance requires careful handling to avoid health risks. If you suspect your ceiling has asbestos, it’s crucial to take safety precautions or consider hiring a professional. Wear a mask, gloves, and protective eyewear to minimize exposure.
It’s also important to contain the work area to prevent asbestos particles from spreading. Use plastic sheets to cover the floor, furniture, and any openings to adjacent rooms. After removal, thoroughly clean the area with a wet mop to pick up any remaining dust. Remember, safety should always be your top priority when dealing with potentially hazardous materials like asbestos.
Smooth Ceiling Finish Techniques
To achieve a smooth ceiling finish, it’s essential to scrape off all the remaining texture and debris. Use a putty knife or a joint compound to fill in any holes or gaps, and then sand it down to create an even surface. This step is crucial in ensuring a flawless finish.
Applying a skim coat of joint compound can also help to create a smooth finish. Allow it to dry completely before sanding it down to a high finish. With these techniques, you can achieve a beautiful, smooth ceiling that’s perfect for painting or finishing with your desired texture.
Don't Get Caught Slipping: 5 Essential Tips for a Safe and Successful Popcorn Ceiling Removal

- Protect yourself from the mess and potential hazards by wearing a mask, goggles, and a hat to keep debris out of your hair and eyes
- Use a sturdy ladder or step stool that can support your weight, and consider having someone hold it for you to prevent accidents
- Dampen the popcorn ceiling with a spray bottle to minimize dust and make the scraping process easier and more efficient
- Work in small sections, about 4×4 feet, to maintain control and visibility, and to avoid getting overwhelmed by the project
- Be prepared for the unexpected, like discovering asbestos or water damage, and have a plan in place for handling these surprises, including calling in a professional if needed
Key Takeaways for a Safe and Successful Popcorn Ceiling Removal
Always wear protective gear, including a mask, goggles, and a hat, to avoid exposure to dust and potential asbestos when scraping off the popcorn texture
Use the right tools for the job, such as a scraper or putty knife, and consider renting a drywall lift or using a ladder stabilizer to make the process safer and more efficient
Take necessary precautions to contain the mess and protect your floors and furniture, and don’t hesitate to seek professional help if you’re unsure about any aspect of the removal process, especially when it comes to asbestos handling
The Liberation of Scraping
Scraping away a popcorn ceiling is more than just a renovation task – it’s a declaration of independence from outdated decor and a breath of fresh air for your home’s soul.
Samuel Jenkins
Conclusion
In summary, removing a popcorn ceiling can be a relatively straightforward DIY project if you’re well-prepared and take the necessary precautions. You’ve learned how to scrape away the old texture, and then apply smooth ceiling finish techniques to achieve a beautiful, modern look. Don’t forget to take asbestos removal safety precautions seriously, and consider hiring a professional if you’re unsure about any part of the process.
As you stand back to admire your handiwork, remember that transforming your space is not just about aesthetics – it’s about creating a healthier, happier environment for you and your loved ones. With your new, smooth ceiling, you’ll be amazed at how much brighter and more welcoming your rooms feel, and you’ll be proud of yourself for tackling a project that might have seemed daunting at first. So go ahead, take a deep breath, and enjoy your newly renovated space!
Frequently Asked Questions
What are the most common problems that can occur when removing a popcorn ceiling?
So, you’re wondering what can go wrong when scraping off that nasty popcorn ceiling? Well, let me tell you – uneven textures, damaged drywall, and asbestos exposure are just a few of the common headaches you might encounter. Not to mention the mess and dust that’ll leave you coughing for days.
How can I determine if my popcorn ceiling contains asbestos?
Dude, checking for asbestos is crucial. You can’t just scrape away without knowing. Look for ceilings installed before the 80s, that’s your first clue. Then, either hire a pro to test it or grab a DIY kit. If it’s positive, don’t touch it, call in the experts to handle the removal safely.
What are the best ways to dispose of the removed popcorn ceiling material?
Ditching the debris is the final hurdle. Just bag it up in heavy-duty trash bags and seal them tight. If you suspect it contains asbestos, label the bags clearly and check local regulations for special disposal instructions – some areas have designated facilities for hazardous waste.